


Create a Leaf and Bark Journal
I ordered some blank books in advance of this project, but you could easily do this on paper. Autumn is the perfect time of year to do this in the northeast! We gathered leaves for rubbings from our immediate neighborhood and did bark rubbings while we were out walking around, labeling the bark rubbings if we knew the kind of tree.
What you need:
- loose paper
- blank book (optional)
- crayons
- glue stick
- scissors
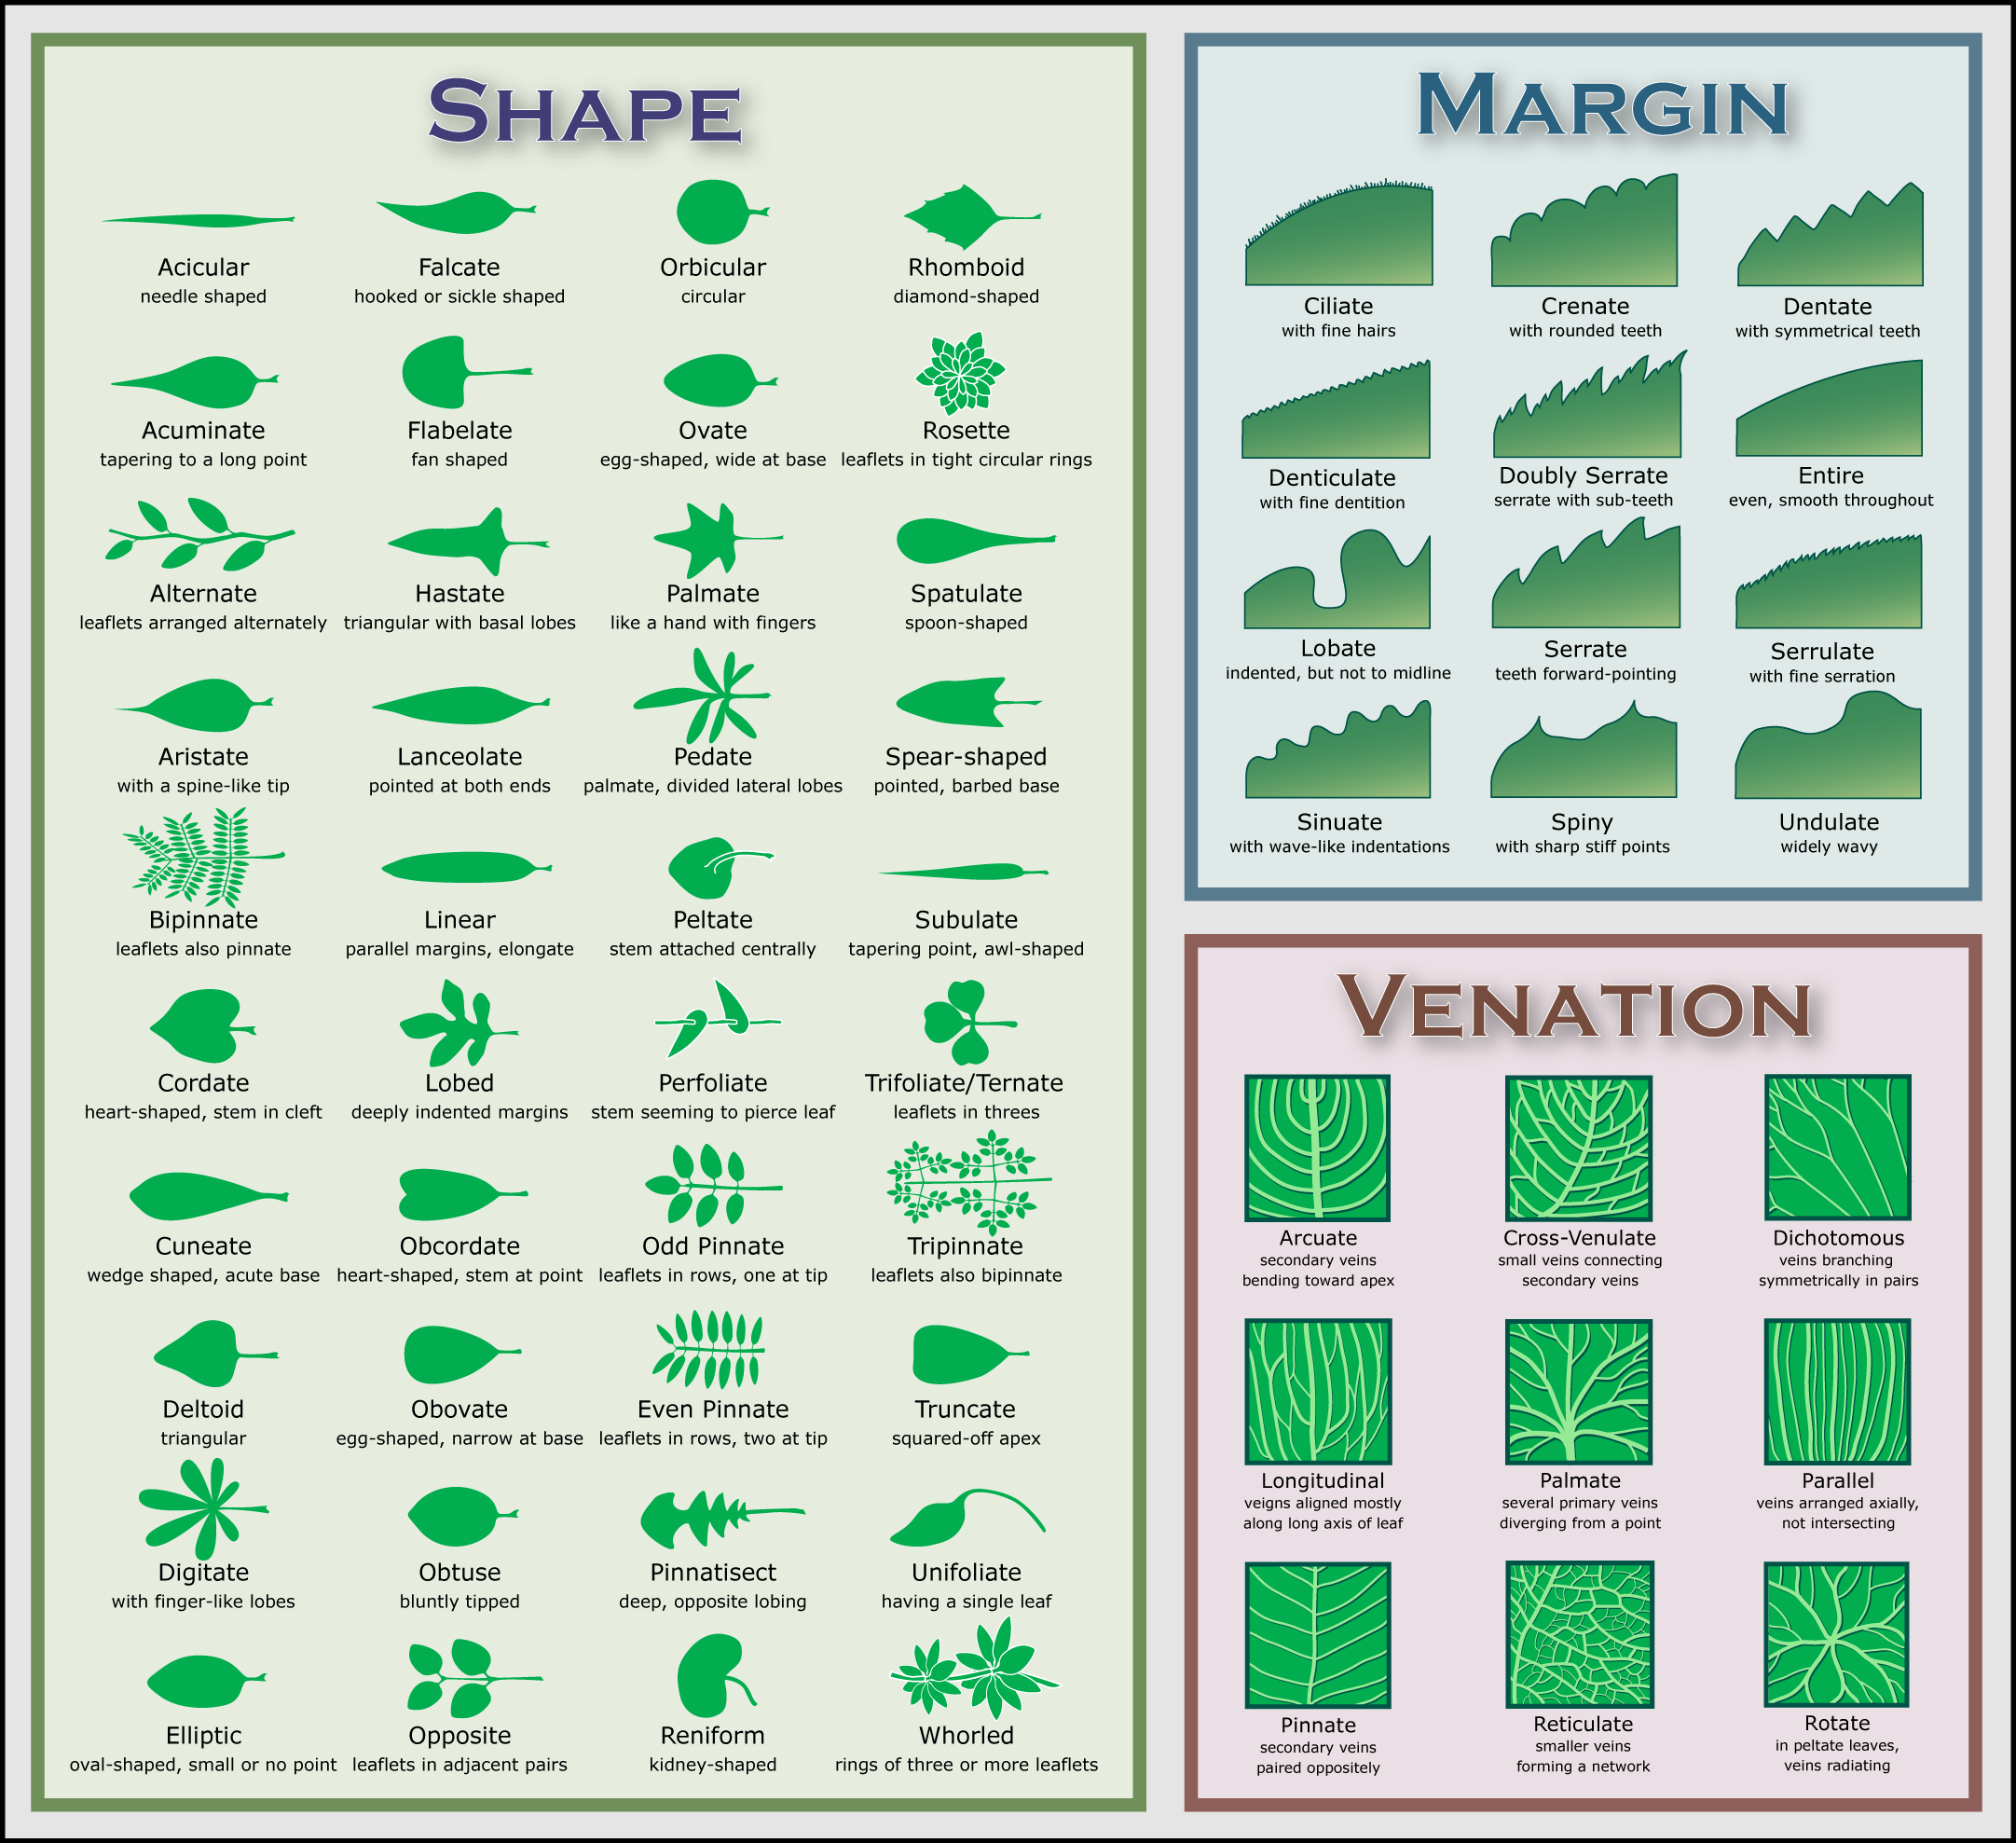
- leaf morphology chart (optional)
Decorate your Leaf and Bark Journal
I found some beautiful leaf stickers on sale at Michaels (don't forget your teacher or homeschooler discount, too!) and had the kids decorate their books:
We then went outside, finding many of our leaves right in our own yard. We did our bark rubbings, noting the difference between the young and old trees, and we collected our leaves.

Use a Leaf Chart
We brought our laminated leaf morphology chart to identify the types of leaves we found:
When we brought the leaves in we started rubbing and cutting them out to fit in our books, leaf on left, bark on right:

Another one:

I really enjoyed this activity and we plan to keep adding to it or start another one when it is full. You could also try pressing the leaves or laminating them to save them.
Kick this Activity up a Notch
If you have older kids, they will still enjoy this activity, but why not take it a step further? Ideas of topics to discuss:- Tree life cycle
- Where do the leaves go after they fall?
- Why do trees have bark? What is its function?
- What do leaves do?
- What do you notice about the types of trees that grow where you live? How are they different from trees that grow in other climates? Why?


